-
 William Duffy
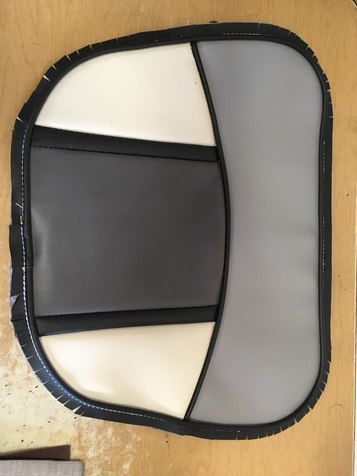
13When I sew something I haven’t done before I experiment first. It started when I saw a motorcycle seat by Roxan Jane. She has inserts sewn in the seat. I decided a half circle would be a good first step before trying one without an open end.
William Duffy
13When I sew something I haven’t done before I experiment first. It started when I saw a motorcycle seat by Roxan Jane. She has inserts sewn in the seat. I decided a half circle would be a good first step before trying one without an open end.
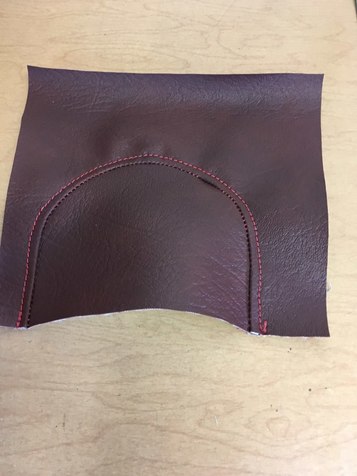
I found it harder then it looks. I still am working on technique. Maybe some of the more experienced trimmers can help me. First I did the layout.
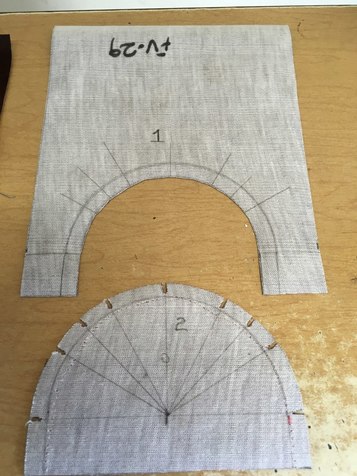
Then sewed it together using the match marks.
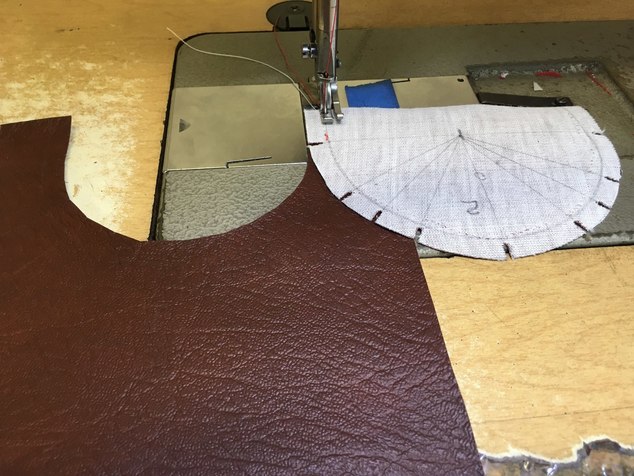
The strangest thing was happening. When I was done they were offset( pic #3). After multiple attempts I tried something different.
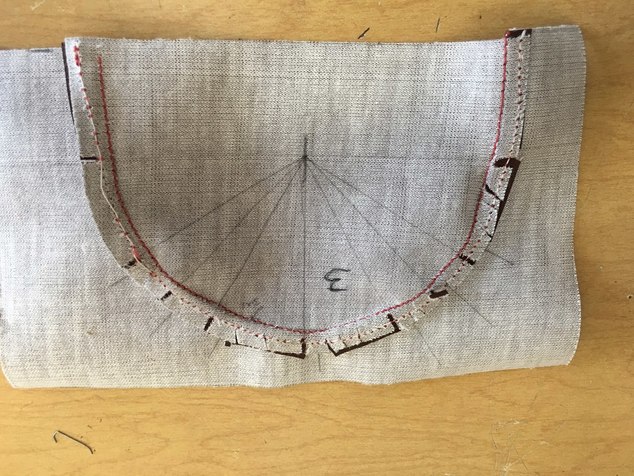
The way I compensated was to lead piece #1 by the amount of offset I observed when I used the match marks. It works. There must be a better way to either sew or layout this half circle. Btw, the circle is a 2 1/2” radius.
Thanks. -
 Naseem Muaddi
38Small radiuses like that are always going to be a challenge. When sewing circles I find it best to sew in two halves from the center point out. Relief cuts in the selvage help and cutting and sewing exactly 3/8" seam allowance is critical.
Naseem Muaddi
38Small radiuses like that are always going to be a challenge. When sewing circles I find it best to sew in two halves from the center point out. Relief cuts in the selvage help and cutting and sewing exactly 3/8" seam allowance is critical. -
William Duffy
13Hi Naseem- thanks for the reply. While I usually us 1/2” I did reduce to 3/8 for this. That helped. Most of my practice ones did have relief cuts. I tried a couple without cuts to see how it effected the problem. No change. As far as starting from the center I would agree it is a more practical way to approach it. Part of the challenge was to correctly lay it out so I could start sewing from one end to the other. I think the problem is in the way it is sewn to lay flat as opposed to boxing/riser. Since the center of the radius is on opposite sides of the needle it causes an offset if you line them up. Yes, small things are hard. This problem does not show up in our marine work due to the larger radius. (See below) Btw, the guy I work for says I over think things. But that is part of the fun.
-
 Matthew B Morgan
1Relief cuts, slow and steady speed. You'll want to stop/ start as little as possible and keep the work you're feeding flat.
Matthew B Morgan
1Relief cuts, slow and steady speed. You'll want to stop/ start as little as possible and keep the work you're feeding flat. -
 Jack Purdue
18It's always easier for me to sew the band (outer circle ) to the insert. You'll find that pulling very slightly on the band as you sew makes your marks line up better. Your picture shows it the opposite way. Like Naseem said, relief cuts, but more of them helps.
Jack Purdue
18It's always easier for me to sew the band (outer circle ) to the insert. You'll find that pulling very slightly on the band as you sew makes your marks line up better. Your picture shows it the opposite way. Like Naseem said, relief cuts, but more of them helps. -
 Cesar Chavez
15Summarizing what Jack, Naseem and Matthew said, the concave edge should be sewn to the convex piece edge. In other words the upper piece (concave edge) should be manipulated over the flat insert (convex edge). The relief cuts are very important to alleviate the sewing procedure at a slow pace.
Cesar Chavez
15Summarizing what Jack, Naseem and Matthew said, the concave edge should be sewn to the convex piece edge. In other words the upper piece (concave edge) should be manipulated over the flat insert (convex edge). The relief cuts are very important to alleviate the sewing procedure at a slow pace. -
 Steve Ingram
36I agree with the last two comments, also try flipping your material over so the selvage is on the right side.
Steve Ingram
36I agree with the last two comments, also try flipping your material over so the selvage is on the right side. -
 Keith Mayne
38No idea on the sewing the insert question but I would find it odd having the seam allowance on the left of the foot.
Keith Mayne
38No idea on the sewing the insert question but I would find it odd having the seam allowance on the left of the foot.


Welcome to The Hog Ring!
This forum is only for auto upholstery pros, apprentices and students. Join today to start chatting.
More Discussions


- Terms of Service
- Useful Hints and Tips
- Sign In
- Created with PlushForums
- © 2026 The Hog Ring